Reviewed: 18 August 2026 · Written by Jay Jung
Most Australian home networks are assembled in the wrong order. A household picks a plan because of an advertised number, keeps whatever router arrived in the box, adds an extender when a back room drops out, then plugs in a dozen smart devices and hopes for the best. Each step is defensible on its own, and the result is still a network nobody can diagnose: slow at 8pm, unreliable in one bedroom, wide open to any device that guesses a shared password.
This guide is the planning layer, not a troubleshooting list. It sets out the order in which the decisions actually depend on each other — what your address can deliver, what tier suits your household, what the router must do, how coverage is built, how the network is divided, and who is responsible when performance falls short. Each step summarises the decision and links to the detailed guide that covers it properly, so nothing here has to be read twice.
Step 1: Establish what your address can actually deliver
The access technology at your address sets the ceiling for everything above it. nbn describes its network as a Multi Technology Mix: fixed-line premises are served by Fibre to the Premises, Fibre to the Building, Fibre to the Curb, Fibre to the Node or Hybrid Fibre Coaxial, while regional and remote premises use Fixed Wireless or Sky Muster satellite. nbn tells households to check their address rather than assume, because two houses on the same street can differ.
This matters before any hardware decision. A premises on Fibre to the Node has a copper segment whose length and condition affect the achievable line rate; a premises on Fibre to the Premises does not. Upload behaviour, latency and how the service holds up under simultaneous use vary by technology, so identical plans on different technologies can feel different in the same household.
nbn also runs a Technology Choice Program and plans technology changes for some locations over time. Treat any future upgrade as information, not as a purchasing assumption: build the network for the technology you have today, and revisit the plan when a change is actually available at your address. Write down the technology type, the location of the connection point or network termination device, and where the existing internal cabling runs. Those three facts constrain every later step, including where a router can physically live.
Step 2: Choose a tier on busy-period evidence, not on the headline number
nbn publishes wholesale speed tiers — Home Basic through Home Fast, Superfast, Ultrafast and Hyperfast — and states plainly that the listed speeds are wholesale maximums provided to internet providers, and that your provider may use a different name for the same tier. The plan you buy is a retail product built on top of that wholesale tier, priced and named by the retailer.
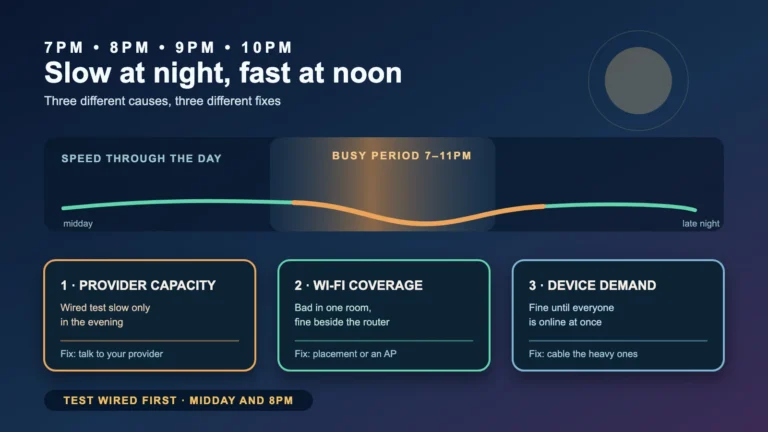
What you should compare is the busy-period figure. Under the ACCC’s approach to broadband speed claims, plan labels describe typical performance between 7pm and 11pm: Basic Evening Speed is less than 15 Mbps, Standard Evening Speed at least 15 Mbps, Standard Plus Evening Speed at least 30 Mbps and Premium Evening Speed at least 60 Mbps. Those are the numbers that correspond to a household streaming, calling and gaming at the same time on a weekday evening. The ACCC also expects providers to disclose technical limitations that cap your maximum speed, either at sign-up or as soon as they are discovered.
Independent measurement data exists but has an end date. The ACCC’s Measuring Broadband Australia program concluded in June 2026, with published quarterly reporting reflecting measurements up to March 2026. It remains useful for understanding how much real services diverged from advertised maximums, and how latency, packet loss and outage rates differed between providers — but it is a historical reference now, not a live scoreboard for this month’s offers.
Size the tier against concurrent evening use rather than device count: four devices idling cost far less than two 4K streams plus a video call and a game update. Our guide to NBN speed tiers walks through tier-by-tier suitability and how to read typical evening speed on an offer. Decide the tier there, then come back — the rest of this plan assumes the tier is settled.
Step 3: Decide what the router has to do before you shop for one
The router is where a good plan is most often wasted. nbn’s own guidance is direct about age: routers made before 2019, or supporting only Wi-Fi 5 and older, may not keep up with faster plans, and households should aim for Wi-Fi 6 or newer hardware and check with their provider that the router is compatible with the plan.
Write the requirements down before comparing products. How many wired ports do you need at the router itself — a work machine, a television, a games console, an access-point uplink? Does the router need to carry the plan’s tier on a single wired connection? Do you need a guest network, a separate network for smart devices, scheduled controls, or a usable set of logs? Hardware that cannot express the design you need will force compromises later.
Placement is part of the specification, not an afterthought. nbn recommends a central, raised, open position at around waist height with clear line of sight to devices, and lists the obstacles that degrade signal: brick and cement walls, metal panels, mirrors, kitchen appliances, water tanks and other wireless devices such as baby monitors. A router hidden in a metal cabinet in the corner of a garage cannot be fixed by buying a faster plan.
If the connection point sits somewhere unhelpful, the fix is usually one cable, not a bigger antenna: run Ethernet from the connection point to a sensible central location and place the router there. Decide this before purchase, because the cable route, not the product page, determines what is achievable.
Step 4: Design coverage as a layout, not as a shopping list
Coverage is a separate problem from capacity. Buying a faster tier does not extend range, and adding radios does not add throughput to the access service. Start with a floor plan: mark where people actually use devices, where walls are solid, and where a cable could plausibly run. nbn suggests mesh systems for larger homes, typically three bedrooms or more, to reduce dead zones and present one network name throughout.
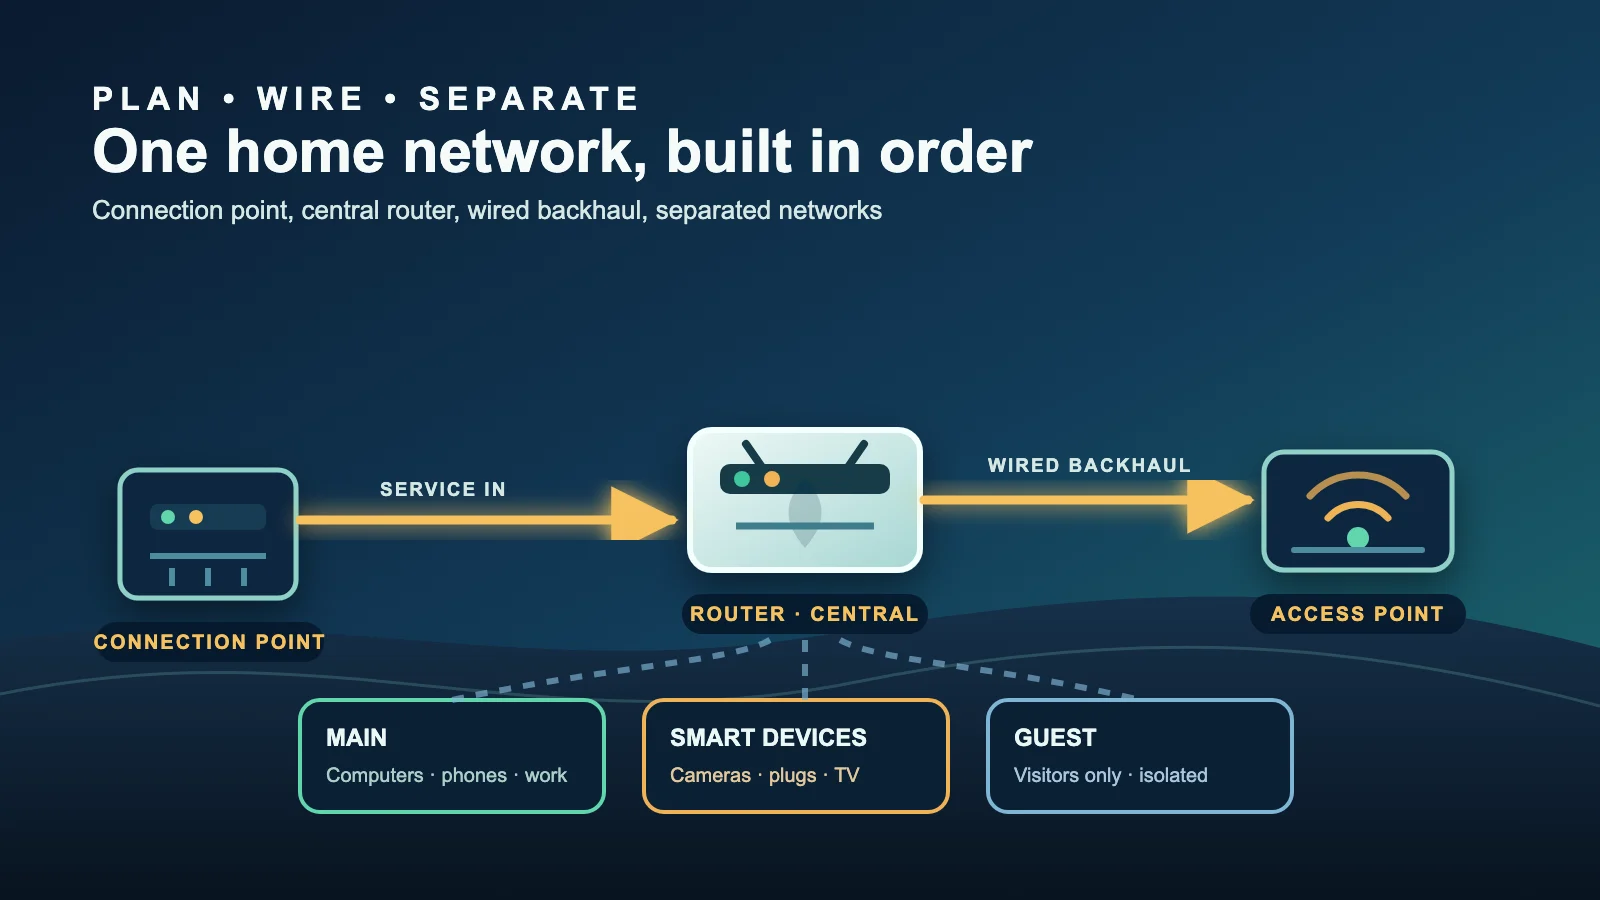
The important choice is how additional access points connect back to the router. A wired backhaul — Ethernet from the router to each access point — gives each radio a clean path and keeps wireless capacity for devices. Wireless backhaul is easier to install and spends part of the radio capacity carrying its own traffic, which is why a badly placed extender can show full signal bars and still feel slow.
Existing infrastructure often helps. Older Australian homes may already have coaxial or telephone cabling, and some have conduit that a data cable can be pulled through. Two well-placed access points on wired backhaul usually outperform four wireless nodes scattered to fill gaps.
Our Ethernet versus mesh Wi-Fi comparison covers the trade-offs, topologies and where each approach is the right answer. Finish that decision before buying, then continue here with the measurement step.
Step 5: Measure in the right order, so a fault has one owner
A single speed test proves very little. nbn’s suggested sequence is worth following exactly: test beside the router, test again over an Ethernet cable, then test in the rooms that matter, and compare Wi-Fi results with wired results to separate a setup problem from a service problem.
Take the baseline before you change anything, and record it: date, time, device, whether the test was wired or wireless, location, download, upload and latency. Repeat during the evening window, because a Sunday-morning result says nothing about a Tuesday at 8:30pm. Keep results in one file so a later comparison is honest.
Read the indicators separately. Download, upload, latency and dropouts fail for different reasons, and a call that breaks up while a download runs at full speed points at contention or Wi-Fi rather than the tier. If the wired test near the router meets the plan’s busy-period expectation while an in-room wireless test does not, the problem is inside the house and belongs to layout or hardware.
Our weak Wi-Fi troubleshooting guide takes that in-house case symptom by symptom. Use it when your measurements point inward; use Step 9 when they point at the service.
Step 6: Divide the network before you add smart devices
Most homes run everything on one flat network: laptops, phones, a work machine, a printer, a television, cameras, plugs, speakers and a guest’s phone all in the same space, all trusting each other. Segmentation is the cheapest structural improvement available on modern consumer hardware, and it is easiest to do before there are thirty devices to move.
A practical division for a household is three parts: a main network for computers and phones, a separate network for smart devices and appliances, and a guest network for visitors that cannot reach the other two. Cameras, doorbells and anything with a cloud account belong in the smart-device group. Long, unique passphrases and unique credentials per network are the baseline; a single shared password handed out for years is the most common weakness in a home network.
Segmentation reduces exposure but does not replace device hygiene. Devices still need firmware updates, individual account passwords, multi-factor authentication where offered, and honest scrutiny of what remote access each one really requires. A cheap camera on a separate network with default credentials and an exposed remote-viewing service is still a cheap camera with default credentials.
Our smart-home device security guide covers per-device hardening, account setup and what to check before buying. Set the network structure here, then harden the devices there.
Step 7: Be realistic about what network-level controls cover
Router-level filtering, category blocking and time schedules are useful for setting household norms, and they are partial by design. They generally apply only to devices using your Wi-Fi, so a phone on mobile data, a laptop on a neighbour’s network or traffic inside a VPN sits outside the rule. Some devices ignore the router’s DNS settings entirely, and encrypted DNS bypasses filtering that depends on inspecting lookups.
Treat these controls as one layer among several: device-level settings, platform and app controls, agreed rules, and conversation. A filter that appears complete is worse than one whose limits are understood, because it produces false confidence. Test what you configure — try the thing you intended to block, on each kind of device — rather than assuming a checkbox works.
Scheduling deserves the same scepticism. A pause rule applied to a device that changes its identifier, or that connects through another device, will not behave as expected. Verify with the actual devices your household uses, then write down what the rule covers and what it does not.
Step 8: Keep the network maintainable
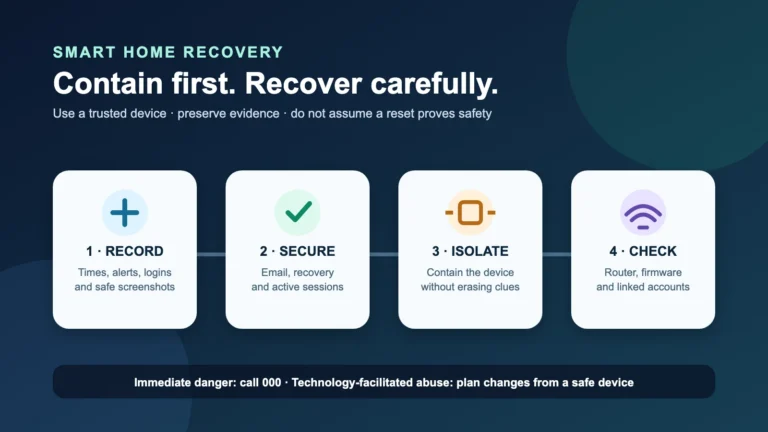
A home network fails slowly. Firmware ages, a temporary setting becomes permanent, a device is replaced and nobody updates the notes. Keep a short record: technology type, plan and tier, router model and firmware version, network names and their purpose, static addresses, access-point locations, cable runs and the date of your last baseline measurement. One page is enough, and it converts a future evening of guessing into a five-minute check.
Set a maintenance rhythm you will actually keep: check for router and access-point firmware updates, review which devices are connected and remove ones you no longer use, re-run the baseline test in the evening window, and re-check that guest and smart-device networks are still separated as intended. Twice a year is enough for most homes.
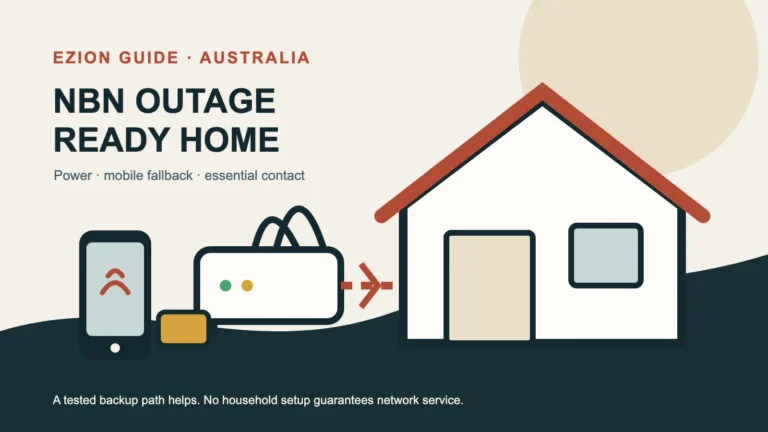
Plan for the failure case too. Know how to power-cycle the connection equipment and the router in the right order, keep the provider’s fault-reporting details accessible, and keep a spare Ethernet cable long enough to reach the connection point for testing. If your household depends on the connection for work, medical monitoring or a home security system, arrange a documented fallback such as a mobile hotspot rather than assuming a short outage will never be inconvenient.
Retire hardware responsibly. nbn suggests checking with your local council, an electronics retailer or your provider about free e-waste recycling for old routers, and factory-resetting any device before disposal so stored network credentials leave with you.
Step 9: Know whose problem it is, and how to escalate
Responsibility is split, and using the wrong channel wastes weeks. nbn’s guidance is that concerns about service performance — slow speeds, dropouts, service loss — and connection delays go to your phone and internet provider, because your provider is the retailer of the service. nbn handles infrastructure matters: property damage, contractor conduct, equipment installation and land access, and it states that it will investigate and contact you within 15 business days of lodgement for the complaints it owns.
Complain with evidence rather than impressions. Provide the technology type, plan and advertised busy-period figure, your wired-versus-wireless results, dates and times, what you have already ruled out inside the home, and the outcome you are asking for. That framing moves a case forward faster than a general complaint about slowness, and it also protects you from being sent back to reboot equipment you already tested.
If your provider does not resolve it, the Telecommunications Industry Ombudsman is the next step. The TIO refers the complaint to the provider through a formal channel rather than general customer service, with published response timeframes of 10 working days for most cases and 2 working days for urgent cases, and it publishes that around 80% of complaints are resolved at that stage before formal investigation.
Separately, Australian Consumer Law guarantees still apply. Products must be of acceptable quality, fit for a purpose you specified and match their description, and services must be provided with due care and skill, fit for purpose and within a reasonable time. The ACCC notes those basic rights cannot be removed by disclaimers or fine print — worth remembering when a retailer points only at a voluntary warranty on a router or a bundled hardware deal.
The build order, in one list
- Check the access technology at your address and note the connection point and existing cabling.
- Choose a tier against concurrent evening use and busy-period figures, not advertised maximums.
- Write the router requirements — wired ports, generation, guest and device networks, controls — before shopping.
- Place the router centrally and raised; run a cable if the connection point is in a poor location.
- Design coverage from a floor plan and prefer wired backhaul for additional access points.
- Take a recorded baseline: beside the router, wired, then in the rooms that matter, including an evening test.
- Separate main, smart-device and guest networks with unique credentials before adding devices.
- Configure filtering and schedules, then test them on each kind of device and record their limits.
- Keep a one-page network record and a twice-yearly maintenance check.
- Route faults correctly: provider for service, nbn for infrastructure, TIO if unresolved.
Official sources
- nbn — Multi Technology Mix and connection types
- nbn — Residential wholesale speed tiers
- nbn — What to look for in a Wi-Fi router
- nbn — Complaints and who to contact
- ACCC — Broadband speeds and speed claims
- ACCC — Broadband performance data (program concluded June 2026)
- ACCC — Consumer rights and guarantees
- Telecommunications Industry Ombudsman — Our process
Disclosure: Ezion Guide has no affiliate relationship with any internet provider, hardware manufacturer, retailer, installer or government body mentioned here. This general information does not guarantee speed, coverage, security, price or suitability for your household. Plans, wholesale tiers, address technology, hardware capability, rules and prices change. Confirm current details with your provider, nbn and the relevant regulator, and follow the manufacturer’s instructions and applicable electrical and cabling rules for any installation work.